FAQs
-
Spare parts
-

Products in general
-
My order
-

Payment
-
Shipping & returns
-

Guarantee & Warranty
-

General
-
Above ground pools
-
Whirlpools
-
Pool ladders
-
Covers
-
Solar showers
-
Thermometer
-

Poolfolien
-
Filter systems
-
Salt systems
-
Pool robots
-
Water care
-
Manuelle Poolreinigung
-
Air beds
-

Sand filter systems
-
Heat pumps
-
Solar
Spare parts
In order to be able to differentiate between INTEX and Steinbach articles internally, we put a 1 in front of INTEX article numbers (Steinbach articles begin with 0). The parts are still identical to those in your instructions.
Products in general
My order
As your order is automatically processed and made ready for dispatch, it is unfortunately no longer possible to change or cancel it. Unfortunately, it is also no longer possible to change the billing or delivery address. Please check your order carefully before clicking on "Order with obligation to pay". However, you can exercise your right of withdrawal at any time and refuse to accept the package or return it to us within 14 days.
To receive the relevant payment information from Unzer, please contact Unzer's customer service. Only they can change your email address accordingly. Unfortunately, we, Steinbach International GmbH, have no possibility to change the address at Unzer. If you paid via PayPal, the e-mail address stored in your PayPal account was used.
As your order is automatically processed and made ready for dispatch, it is unfortunately no longer possible to change or cancel it. Unfortunately, it is also no longer possible to change the billing or delivery address. Please check your order carefully before clicking on "Order with obligation to pay". Please contact us via our contact form to possibly apply changes.
For ecological reasons, we do not print the invoice and enclose it with the package. The package therefore does not include a printed invoice as standard. After the goods have been dispatched, we send the invoice by e-mail to the e-mail address used in the webshop. Customers who have their own customer account in the webshop can also call up the invoice from their customer account at any time.
Payment
After completing your order, you will receive the associated invoice information by mail. Please use only the bank data and payment references specified on the invoice.
The payments from Unzer are read automatically and can therefore only be assigned with the correct payment reference and amount. If these do not match, it is possible that the amount will be transferred back. If you have any questions about this, please contact Unzer's customer service directly.
If you have paid via PayPal, the invoice amount has already been authorized in PayPal when you completed your order and no further action is required on your part.
Please contact the Unzer customer service. It may be that your payment was not processed correctly. There may simply have been an overlap between your payment and the issuance of the reminder.
Shipping & returns
We deliver parcels via DPD or the Austrian postal service.
Pallet shipments are delivered via the forwarding companies Schenker, Dachser or Gebrüder Weiß.
An automatic tracking link will be sent by email after the goods have been dispatched. We try to dispatch your goods as quickly as possible, but we ask for your understanding that there may be delays, especially during the high season. If your order includes a polystyrene pool, there may be waiting times of up to 6-8 weeks, as the pool liners are specially tailored to the customer's wishes and are therefore a personalised product.
You can check the current status of your order via the following link: https://www.steinbach-group.com/en/orderstatus. Please note that the order status can be viewed from approx. 2-3 hours after receipt of the order.
You have received a tracking link from the shipping company, open it. If you receive your goods from the forwarding company Bexity, enter your reference number in the necessary field for tracking the shipment. The reference number was either sent to you by e-mail or you can also find it in the link sent to you under the parameter "refnum=". Then click on the "Status abrufen" button and the shipment tracking will open after you have requested your postal code.
You can check the current status of your order via the following link: https://www.steinbach-group.com/en/orderstatus. Please note that the order status can be viewed from approx. 2-3 hours after receipt of the order.
Within the legal right of withdrawal, you can return the goods free of charge. If you have a customer account in the webshop, please register the return via your customer account. To do this, you can select the order in your customer account and select the "Returns" field under "Actions". You can select the items you would like to return and will receive a GLS label by e-mail after completion. This e-mail also contains a description of how to proceed. If you do not have a customer account in the webshop, please register your return using this link. Please have the following information ready: Order number (You received this by e-mail after completing your order. It is a 10-digit alphanumeric value beginning with W.), invoice Surname (the surname with which the order was originally placed/the surname of the invoice recipient) and e-mail address (the e-mail address with which the order was originally placed).
Please note that the processing of the return may take some time. You can track when the goods have arrived at our house via the tracking link. Please allow around 7 working days for the goods to be processed by us and for the goods to be recorded. After the return has been successfully checked, your money will be refunded via the original payment method. You will receive an email shortly after the return has been recorded with the corresponding credit, which will be transferred back accordingly.
Please submit your complaint via the contact form, and our staff will attend to your request as soon as possible.
Please submit your complaint via the contact form, and our staff will attend to your request as soon as possible.
Yes, the delivered parcel must be checked for damage immediately!
If there is any transport damage, please make a note of this immediately and before you sign for acceptance of the goods.
Guarantee & Warranty
General
Discount yes or no? If there are promotions in our web store, a discount will be displayed on the product and automatically deducted from the order. If no promotion is known, unfortunately no discounts can be granted/booked and no price adjustments can be made. Our offers are updated daily and are dynamic, which can occasionally lead to price adjustments.
The promotional periods for certain discount or voucher codes, which can be entered in the shopping cart, are always indicated directly with the respective code.
Above ground pools
If the weld seam of a pool liner opens, this is a manufacturing defect. In diesem Fall wird die Poolfolie innerhalb des Garantiezeitraums ausgetauscht. Please refer to the warranty information in the operating instructions and send your request to our Helpdesk.
Whirlpools
If you have the feeling that air is escaping from your whirlpool liner, this can have various causes. This is not always the result of a hole in the liner.
Cause 1:
During initial commissioning or after winterising, creases can occur in the hot tub during storage or when the pool is folded up. Especially when stored in cool rooms (e.g. cellars), the material needs time to expand and adjust to the ambient temperature when it is first inflated. For this reason, air often has to be pumped in during the first use. This effect has a physical cause and is therefore not a defect.
Solution: Inflate more often, especially at the beginning.
Cause 2:
It may appear that your spa has lost air overnight. This is due to the large temperature differences between day and night. During the day, when it is warmer, the air inside the whirlpool foil expands. At night, when temperatures drop, the air contracts, which can make the hot tub appear slightly ‘softer’ in the morning. As soon as the temperature rises again during the day, the air inside the whirlpool foil expands again and the whirlpool returns to its original shape. This effect is also illustrated in the enclosed operating instructions in the ‘Inflation’ chapter. This effect has a physical cause and is therefore not a defect.
Solution: Pump air more often, especially at the beginning.
Cause 3:
If air escapes from the pool liner without a hole being visible, it may be that the pressure relief valve is not properly tightened or is not sealing properly due to dirt particles. This can cause air to escape gradually.
Solution: Please check the air valve. Further information can be found in the section ‘Spa air valve attachment’ in the enclosed operating instructions.
Your spa liner may have a hole in it. The first step is to find the damaged area. This can be on the inside or outside of the spa liner.
Inside of the whirlpool film:
Switch off all functions of the hot tub and wait until the water level is calm. If the hole is on the inside, you will notice air bubbles on the surface of the water. You have now successfully located the hole!
Solution: Use the repair patches supplied and an underwater adhesive. Follow the instructions for gluing with underwater adhesive.
Outside of the whirlpool liner:
You will need a bucket of soapy water and a sponge or spray bottle for the repair. Soap the sink thoroughly. Air bubbles will form at the damaged area - you have now successfully localised the hole!
Solution: Switch off the device completely, let all the air out of the whirlpool tub and clean the damaged area thoroughly so that it is free of grease and dirt. Dry the area carefully and apply a thin layer of adhesive from the repair kit around the leak. Cut the patch to the right size, stick it over the crack and make sure that there are no air bubbles. Press the patch firmly into place and allow the adhesive to cure in a dry environment for 24 - 48 hours before using or inflating the spa again.
Please note:
If the leak is located at a seam, it is unfortunately not possible to seal it with adhesive. It is almost impossible to permanently seal the hole at seams. In this case, you will need a new pool liner.
This can have two causes:
Cause 1: The hot tub has been exposed to direct sunlight for a longer period of time. The air inside expands and the whirlpool tub (cover) bulges.
Solution: Please check the air pressure and deflate if necessary. This process is particularly important in hot weather to avoid damage!
Cause 2: Stabilising threads inside the whirlpool (cover) are torn. This causes the cover to lose its shape. Unfortunately, this is irreparable.
First of all, make sure that both the whirlpool tub and the control unit are on a level surface and at a suitable distance from each other to avoid differences in level.
Tighten the inlet and outlet connections and ensure that the O-rings and seals are in the correct place, cleaned and undamaged. Check the connections for cracks and replace defective parts if necessary. To improve tightness, O-rings can be lightly lubricated with detergent, water or Vaseline.
Plug the control unit directly into a socket and do not use extension cables or distributors. Check your house wiring for overload, the socket may have a defect. Contact a qualified electrician. Reset the residual current circuit breaker.
Make sure that the SPA is plugged in and turned on and that the control panel power plug is securely attached to the control unit. Check the power source and reset the FI switch.
Switch off the whirlpool tub and disconnect the mains plug of the control unit. Ensure that the cover grille of the filter cartridge unit is clean and free of obstructions. Clean or replace the filter cartridge, see section ‘Maintenance and storage’ in the operating instructions. Ensure that the inlet and outlet connections on the whirlpool tub and filter pump are not blocked. If necessary, rinse the control unit with the garden hose (please note the connections). Ensure that the spa water is properly sanitised so that the filter element remains clean and does not clog.
E90 may appear if the cartridge filter container is fitted to the wrong connection. The tank must be fitted to the lower connection - the ‘suction grille’. The water is sucked in there, the dirt remains in the cartridge and the clean water is pumped through the motor block. The water flows back into the tank through the inlet nozzle. If the container is incorrectly connected to the inlet nozzle, dirt may enter the pump motor through the intake grille. Hair can become wrapped around the pump rotor and the error code E90 is triggered.
Remove the electrolytic storage cell for inspection and cleaning if necessary. Use salinity test strips to check the value of the water. Add salt. See “Salinity Information”. Make sure the cell's cable is securely plugged into the socket. Replace the memory cell if necessary.
If the salt content is too high, drain some of the pool water and fill it up with fresh water. Remove the electrolytic storage cell for inspection and cleaning if necessary. Use salinity test strips to check the value of the water. If the salt content is too high, drain some of the pool water and fill it up with fresh water. Make sure the cell's cable is securely plugged into the socket. If necessary, replace the memory cell.
If the ambient temperature is below 4ºC, we recommend not using the whirlpool. Switch off and unplug the control unit. Add some warm water to raise the water temperature of the whirlpool to over 5°C (41°F). Then press the button to heat the water to the desired temperature.
Switch off and unplug the control unit. When the water has cooled down, turn on the FI and restart everything. Turn off the heating. Then press the Filter and Bubble buttons to lower the water temperature.
Switch off and unplug the control unit. Turn on the FI again and restart everything.
The unit needs to be checked/repaired.
The unit needs to be checked/repaired.
Press the water filter button to activate the filter pump again. After 72 hours of continuous heating operation, the pump automatically switches to idle mode. The quick heating and water filtration functions are deactivated.
If your Intex spa control unit does not establish a WiFi connection, there may be various causes. Here you will find an overview of possible solutions:
1.) Check the compatibility of the WiFi network
Important: The Intex Spa App only works with 2.4 GHz networks.
Many modern routers transmit both 2.4 GHz and 5 GHz frequencies. The control unit only works with 2.4 GHz WLAN networks - not with 5 GHz. Make sure that your smartphone and the spa are connected to the 2.4 GHz network.
2.) Optimize signal strength and position
- Place the spa close to the router to ensure a strong WiFi signal.
- Booster vs. access point: Access points are considered more reliable than boosters as they are wired to the router and therefore provide a stable Wi-Fi signal.
- Deactivate the “Hidden network” option, as the Whirlpool cannot connect to such networks.
- Deactivate mobile data on the smartphone to avoid disconnections due to network changes.
3) Adjust router settings
Many routers support dual band (2.4 GHz and 5 GHz) and often automatically connect devices to 5 GHz. There are two options to ensure that the Whirlpool can be paired with the correct 2.4 GHz network:
Option 1: Deactivate 5 GHz: Temporarily disable the 5 GHz band to force pairing with the 2.4 GHz network.
Option 2: Rename networks, e.g. “MyWLAN_2.4GHz” and “MyWLAN_5GHz”, to select the correct WLAN.
In the event of connection problems, a router restart often helps: briefly disconnect the device from the power supply and reconnect it. Further details can be found in your router manual. If difficulties persist, please contact your internet provider.
4) Use the correct app
Check that you are using the correct app for your whirlpool.
The correct app depends on the model year of your spa. Check the model designation on the back of your control panel.
If your model name ends in "TY", then use the app: Intex Link
If your model name does NOT end in "TY", then use the app: Intex Link - Spa Management
Pool ladders
An incorrectly set pH value or a chlorine value that is too high can cause rust to form in a very short time.
Ensure that the pH value and the disinfectant are set correctly. To avoid deposits on the underwater accessories, ensure that the water is circulated daily.
Avoid using water care products or shock chlorination in the vicinity of the ladder and ensure that no splashes or deposits form on or around the ladder.
Remove the ladder from the pool after each use, rinse it with clean tap water and dry it thoroughly with a lint-free cloth, paying attention to the areas in between.
Covers
The additional plastic strips secure your cover against lifting in the wind.
A protective ground cover is used to protect the pool liner from dirt. Before you put it on, the ground must be clean of stones, wood or similar.
Small holes can be repaired with a transparent UV-resistant and self-adhesive foil.
Solar showers
Please note that the water temperature in the tank of the solar shower is determined by the balance between the energy input via solar radiation and the energy loss to the environment. The surface temperature of the shower corresponds approximately to the water temperature in the tank. The moment the water in the shower is warmer than the ambient air, the shower also releases the heat back into the environment. The solar energy input can be influenced by choosing the right orientation for the shower.
Tips for efficient heat gain:
- Choose a location for the solar shower with all-day and direct sunlight.
- With a light-coloured décor, choose the orientation of the solar shower so that the dark side points towards direct sunlight.
- Wind inevitably increases the energy output of the shower; the maximum achievable water temperature in the tank is reduced accordingly. Protect your solar shower from the wind.
Try to seal the connections with Teflon tape.
- If the product is not used for a long time, bacteria can multiply in the tank and cause unpleasant odours. Empty the product before foreseeable or after a long period of non-use.
- Check the hose used to supply tap water to the solar shower. If water has been standing in the hose for a long time, rinse the water supply hose thoroughly and clean it if necessary.
- Only use fresh tap water to fill the shower - do not use cistern water or well water.
Thermometer
If the contacts on the circuit board are not correctly aligned, values will not be transmitted correctly.
Open the housing of the front-door station and check that the display disc is inserted correctly as described in the chapter ‘Inserting or changing batteries’ and that the housing is properly closed.
If the indoor station loses the radio signal from the outdoor station, three dashes (‘--.-’) appear instead of the temperature display. This can be caused by exceeding the range (>60 m in the open field), signal failure, a battery change or empty batteries.
In this case, you should check whether the transmitter search can be started manually as described in the operating instructions under ‘Activating the transmitter search manually’.
Poolfolien
Small holes in the pool liner can be easily patched with a repair kit to prevent water loss and additional costs. If it is a tear in the seam and is still under guarantee or warranty, contact customer service for a replacement. If the warranty has expired, the repair kit can save the liner for one swimming season before it is disposed of at the end of the season and replaced with a new one.
Due to the nature of the material, external environmental influences or incorrect handling of the pool liner, it cannot be ruled out that holes or tears may occur in the pool liner.
Possible causes are:
- Incorrect storage, e.g. below the minimum temperature of 5 °C specified in the operating instructions.
- Incorrect use of pool chemistry (incorrect dosage, etc.)
- Use of chemistry that is not suitable for pool operation
- Insufficient cleaning after dismantling - residues on the pool liner start to react and attack the material
- Holes can also be caused by animals (cats, birds, rodents, etc.)
Filter systems
Preparation:
1. make sure that the power cable of the pump is disconnected from the mains.
2. use a PH1 Phillips screwdriver to remove the screws from the timer cover and remove the cover.
3. pull out the plastic strip that can be seen underneath the battery.
4. screw the cover back on. The timer's memory backup function is now activated.
Caution: If the steps described below are not carried out, the timer will still function correctly. However, if the power supply is interrupted, the stored filter run times will be deleted.
Setting the timer:
1. connect the mains plug of the pump to the power supply. The runtime display flashes (if the battery is inserted, the last selected runtime is displayed).
2. press the "Timer" button several times until the LED for the desired running time lights up.
3. switch the pump on by pressing the "ON/OFF" button on the timer. From this point on, the pump runs and deactivates automatically after the selected running time. The timer reactivates the pump every day at the same time for the same running time (once every 24 hours).
1. Insert two of the filter arms into the filter screen until they click into place and check that the filter arms are firmly seated.
2. insert the riser pipe incl. filter screen with the two pre-assembled filter arms into the filter bowl.
3. insert the remaining filter arms into the filter screen inside the filter bowl until they click into place and check that the filter arms are firmly seated.
4. position the filter sieve in the middle of the base of the filter bowl.
All Steinbach and INTEX filter systems (sand filter systems, cartridge filter systems & filter pumps) are suitable for salt water as long as the salt content in the water is below 0.5 % (salt electrolysis). Before winterising, clean the filter system thoroughly with standard bathroom cleaner, clear tap water and a lint-free cloth.
The sound pressure level may vary from model to model. Please refer to the ‘Technical data’ section in our online shop for the sound pressure level of your system.
Salt systems
No, the salt system must NOT be positioned in a technical shaft, as the high humidity can interfere with its function.
Pool robots
Water care
Die nachfolgende Grafik soll Ihnen helfen die Idealwerte des Poolwassers einstellen zu können.
Manuelle Poolreinigung
The red LED indicator always lights up as soon as the charger is connected. It never stops glowing during the charging process. The unit is fully charged after 8-10 hours. Since model 2020, the LED changes from red to green when fully charged.
Please note that the underwater handheld vacuum only works under water. A test without water is not possible.
Air beds
Sand filter systems
Heat pumps
Solar
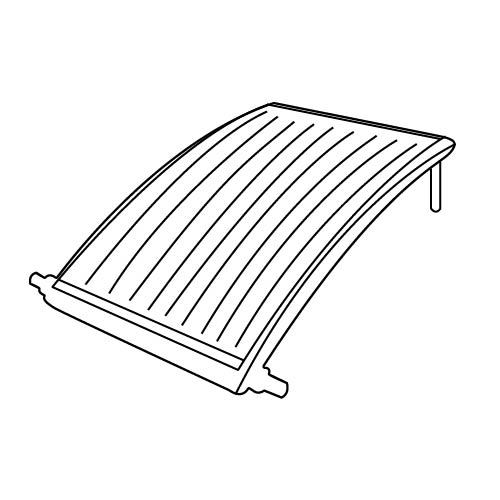
Place the solar heater in a way that it is standing stable and straight on the ground and the top is directly exposed to the sun. The top of the product must always face the sun and must not be covered or in the shade.
The product is designed exclusively for placement on the ground. Never place the product above the water level.
Place the product at least 1 metre away from the pool and leave enough space for maintenance and cleaning work.
The solar heater must be installed last in the circuit so that filtered water enters the pool directly heated. It should be positioned as close as possible to the water inlet nozzle at a distance of at least 1 metre to reduce heat loss.
Yes, the solar heaters are designed so that several heating elements can be connected together. Please note that the circulation capacity of the filter system will be reduced if several heating elements are connected. We therefore recommend increasing the daily circulation rate in order to filter your pool water optimally. With a large number of connected solar heaters, it may be necessary to switch to a more powerful filter pump to ensure the circulation capacity for the necessary water treatment.
The solar collector must be emptied at the latest before the first frost and stored in a frost-proof place (≥ +5°C) without direct sunlight.
1. check that the fill level of the pool is below the inlet nozzle. If not, close the inlet nozzle with a plug.
2. Fully unscrew the inlet and outlet screw rings. Caution! Residual water in the hoses will leak out.
3. Pull the sleeves and pipes out of the inlet and outlet.
4. Empty the product completely until there is no more water in it.
5. clean the inside and outside of the product using only a standard bathroom cleaner, clean tap water and a lint-free cloth. Aggressive cleaning agents can damage the product. Dry the product with a lint-free cloth.
6. allow the product to dry completely. If there is water inside the appliance and it freezes in winter, the expansion at low temperatures could damage the solar chambers of the appliance.
7. store the product in a dry and frost-proof place (≥ +5°C) without direct sunlight.
The solar mat must be emptied at the latest before the first frost and stored in a frost-proof place (≥ +5°C) without direct sunlight.
1. Check that the fill level of the pool is below the inlet nozzle, otherwise close the inlet nozzle with a plug
2. empty the product completely until there is no more water in it. Caution! Residual water in the hoses and in the solar mat will leak out.
3. Only clean the inside and outside of the product with a standard bathroom cleaner, clean tap water and a lint-free cloth. Aggressive cleaning agents can damage the product. Dry the product with a lint-free cloth.
4. Allow the product to dry completely. If there is water inside the appliance and it freezes in winter, the expansion at low temperatures could damage the solar chambers of the appliance.
5. Ensure that the product is only rolled up slightly so that it is not damaged by kinks.
6. store the product in a dry and frost-proof place (≥ +5°C) without direct sunlight.
Tip: To prevent the product from sticking together after rolling up, you can sprinkle some talcum powder on the mat.
Included in the delivery is a lugged 38 mm hose with a length of 100cm, with which you can easily make the connection.
Up to 6 mats - please refer to the instruction manual for more detailed information.